Create Ugly Sales Letters That Get You Leads & Sales
Aug 29, 2022

Did You Know That Ugly Video Sales Letters Can Get You beautiful Results?
A Read and then Speak “Ugly Sales Letter”
There are times when you may want to use a slide presentation rather than recording yourself on camera e.g., in a Sales Funnel or an Ever-Green Webinar. Note: The purpose of this post is not how to compose the content but rather how to take your sales to copy and then convert it into a video that you can use to market your products and services.

Many people attempt to create a slide sales letter by creating the slides and then recording a finished video by reading the script on each slide at the same time while running animations and clicking through the animations.
It seems like the right way to do it and I must confess; that I am guilty of doing this – the problem is that using this approach is way harder than it needs to be, and it doesn’t leave you with a professional result.
Step 1 – Create A Script / Sales Copy
1. Write your Script (like you are having a conversation)
2. Read it out loud to ensure it sounds conversational
3. Rehearse it out loud
4. Add Your Personality Use Inflection, Insert Pauses (….), Laughs (“Ah Yea, hahaha”)
5. Where you want to use images type “Insert Image”
6. Where do you want to use a video capture type “Insert video”
7. Use a Word Doc and set the text at size 16 font and your line spacing at 1.5 so that when you read your script it is easier to see
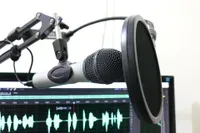
Step 2 – Record Your Voice Over
1. As you begin recording wait about 10 seconds before you begin to speak
a. This gives your microphone an opportunity to adjust to any background noise
b. This also gives you time to turn on your slides when you are ready to record them
2. Read it using Inflection, Pauses, and Laughs
3. If you’re not satisfied with the way you read a line or if you made a mistake just clap your hands 3 times and do it again until it sounds great – makes editing easy to see the mistakes you made and remove them
Step 3 – Edit Your Voice Over
1. Remove all the Gaps (Pregnant Pauses} Speeds Up Your Audio
2. As you begin recording wait about 10 seconds before you begin to speak
a) This gives your microphone an opportunity to adjust to any background noise
b) This also gives you time to turn on your slides when you are ready to record
them

Step 4 Speeding Up Your Audio ( To Sound More Energized and Keeping Your Listener’s Attention)
1. Speed up your Audio Track Using Audio Compression
Step 5 – Create Your Slides
1. Your Script can have more information than our Slides
2. Use Bullets, Word/s Or Sentence – Not Blocks of Text
Step 6 – Combine Voice-Over with Slide Presentation
1. Begin your audio and then record your slide presentation – simply click through your presentation/animations
2. One of the great things about recording your presentation this way is that you are not concerned about any sounds being recorded as you only are going to keep the video portion.
Step 7 – Final Edit – Tidy up recording
1. Add Optional Record Yourself Giving Intros and Outros / Call to Actions
2. Remove any Dead space on recorded – audio with video
Step 8 – Add Music
1. Match music to your Sales Message
2. Ensure your background music is not overpowering your recorded audio track
Step 9 – Create Finished Video
1. Click Render
Step 10 – Review Video
1. Send your video to your close group of your Colleagues to review and get feedback
2. Using the feedback repeat the steps listed above to complete your project

